How to Make Compost at Home (Even in Small Spaces)
Composting suffers from an image problem in two directions at once. Half the internet makes it sound like a precision science — carbon ratios calculated to the decimal, thermometers, turning schedules — while the other half implies you can throw anything on a heap and nature sorts it out. The truth sits comfortably between: composting is forgiving but not automatic. Learn four ideas — browns, greens, moisture, air — and you can turn kitchen scraps and yard waste into the best soil amendment money can’t buy, in a backyard bay or an apartment-balcony tumbler.
And it’s worth doing beyond the garden payoff: food scraps and yard trimmings make up a huge share of household trash, and in a landfill’s airless depths they decompose into methane rather than soil. The same banana peel, composted, becomes fertility. Few habits return so much for so little.
What compost is
Compost is what remains when an army of microorganisms — bacteria first, then fungi, joined by insects and worms — eats organic material and each other until nothing recognizable remains. The finished product is dark, crumbly, and smells like the floor of a healthy forest, because that’s essentially what it is.
In the garden, compost’s magic is less about nutrients (it has some, released slowly) and more about structure and life. Worked into heavy clay, it opens drainage channels. In sand, it acts as a sponge. Everywhere, it feeds the microbial community that converts soil minerals into forms roots can drink. It is the one amendment that improves every soil type, which is why nearly every guide on this site — from starting a vegetable garden to filling raised beds — eventually says the same word: compost.
Browns and greens: the only chemistry you need
Compost microbes eat a balanced diet of two ingredient families:
Browns (carbon-rich, usually dry and dead):
- Fallen leaves — the classic, worth hoarding every autumn
- Straw and dried grass
- Shredded cardboard and plain paper (no glossy coatings)
- Wood chips and sawdust from untreated wood
- Dried corn stalks, pine needles (in moderation)
Greens (nitrogen-rich, usually moist and recently alive):
- Vegetable and fruit scraps
- Coffee grounds (filters too) and tea leaves
- Fresh grass clippings
- Fresh plant trimmings and spent annuals
- Eggshells (technically neither, but welcome — crush them)
The working rule: two to three parts browns to one part greens, by volume. You don’t need to measure — you need to notice. A pile that’s mostly kitchen scraps turns wet, dense, and smelly (too green). A pile that’s all leaves sits there for years doing nothing (too brown). The fix for each is always the other ingredient.
Keep out entirely: meat, fish, dairy, oils, and cooked foods heavy with them (rodent magnets, and home piles rarely run hot enough to make them safe); dog and cat waste (pathogens); diseased plants and weeds carrying seeds (many survive a cool pile and get replanted with your compost); and grass clippings from lawns treated with persistent herbicides, which can pass through composting intact and damage next year’s tomatoes.
Alt: Compost browns including leaves and cardboard next to compost greens including vegetable scraps and coffee grounds
Caption: The whole recipe: two to three scoops from the left pile for every one from the right.
Choose your container (or don’t)
The microbes don’t care what the pile lives in; containers exist for tidiness, rodent-resistance, and neighborly relations.
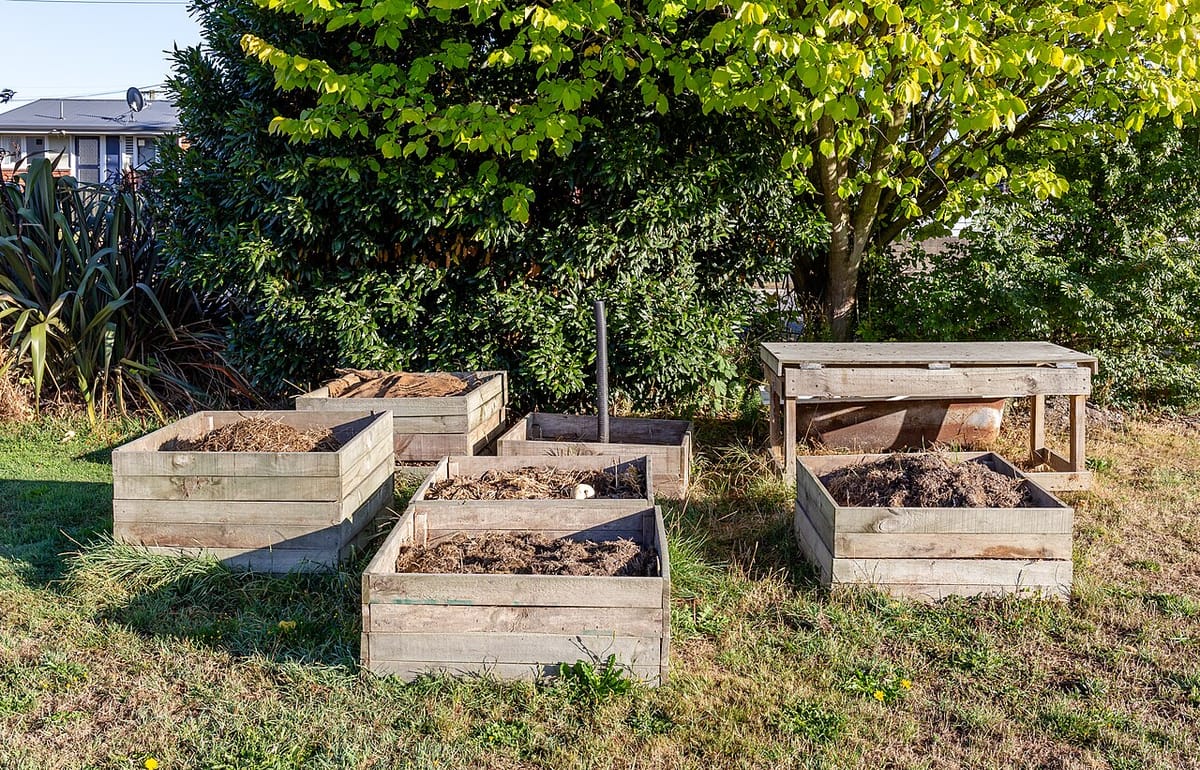
- Open pile: free, simple, fine for yard waste in a tucked-away corner. Aim for at least 3×3×3 feet — smaller piles lose heat and moisture too fast to work efficiently.
- Wire or pallet bin: an afternoon’s DIY; contains the pile while letting air through the sides. The three-bay version (fill one, turn into the next, harvest from the third) is the classic for a reason.
- Plastic compost bin (“dalek” style): enclosed, tidy, pest-resistant, cheap — many municipalities sell them subsidized. Slower than an open pile (less air) but ideal for suburban kitchens’ steady scrap stream.
- Tumbler: a drum on an axle; turning becomes cranking. Fast, rodent-proof, back-friendly, and the best fit for patios and small yards. Its limit is capacity — fill it, then let that batch finish while scraps queue elsewhere.
- Worm bin (vermicomposting): the indoor/balcony solution. A ventilated bin, bedding, and composting worms (red wigglers, purchased — not garden worms) quietly convert kitchen scraps into castings under the sink. No smell when run right, and the castings are potent stuff.
Site outdoor bins on bare soil if possible (decomposers move in from below), in part shade so the pile doesn’t bake dry, and within hose reach — close enough to the kitchen door that February-you will still make the trip.
Building and running the pile
The layered start
- Begin with a coarse layer of twigs or stalky material for airflow at the base.
- Alternate layers: a few inches of browns, a thinner layer of greens, repeat. Toss in a shovelful of garden soil or finished compost somewhere along the way — a free microbial starter culture.
- Moisten as you build. The target, and the best phrase in all of composting instruction: as damp as a wrung-out sponge. Squeeze a handful; it should feel clearly moist but yield barely a drop.
- Cap with browns. Every time you add kitchen scraps thereafter, bury them under or stir them into the pile and re-cover with browns — exposed food scraps are an invitation to flies and rodents; covered ones are invisible.
Hot, cold, or in-between — your choice of speed
Cold (passive) composting is what most households do: add materials as they’re generated, keep rough brown/green balance, turn it occasionally or never, and harvest finished compost from the bottom in six to twelve months. Nearly zero effort. The trade-offs: slower, and it won’t kill weed seeds or plant diseases, so be choosier about inputs.
Hot (active) composting builds the whole pile at once (which is why leaf-hoarding matters — you need browns in bulk), keeps it damp, and turns it weekly. Microbial activity heats the core to 130–160°F — steaming on a cool morning — which speeds everything dramatically and kills most seeds and pathogens. Finished compost in one to three months. It’s the difference between a slow cooker and a stove: same dish, more attention, faster dinner.
Most gardeners land in between: a mostly-cold pile that gets a few enthusiastic turnings each spring and fall. That’s fine. Every turn adds air and speed; none is mandatory.
The two dials: moisture and air
Whatever your style, ongoing management is just two checks:
- Moisture: wrung-out-sponge, always. Dry pile → sprinkle while turning. Soggy pile → turn in dry browns and, in a wet climate, cover the top with a tarp.
- Air: the good microbes breathe. Turning with a fork — outside material to the middle, middle out — is the classic aeration. In a bin you can’t turn, poking vertical channels with a stake or adding coarse browns achieves most of the same.
Troubleshooting, by symptom
Rotten-egg smell. Wet and airless. Turn thoroughly, add dry browns, tarp against rain. Recovery takes days.
Ammonia smell. Green overload — common in grass-clipping season. Mix in browns; add clippings in thin layers, not thick mats, in the future.
Nothing is happening. Too dry (most common — water it), too brown (bury some greens in the core), or too small (pile up more material; little piles are slow piles). In winter: normal, wait for spring.
Flies and gnats. Food scraps sitting exposed. Bury additions and keep a browns cap on the pile.
Rodents. Almost always meat/dairy/cooked food in the pile, or easy access. Stop the former; switch to a closed bin or tumbler for the latter.
Sprouting seedlings in the finished compost. Your pile ran cold and something went to seed. Harmless — hoe them in — but a vote for hotter composting or stricter inputs.
Harvesting: knowing when it’s done
Finished compost is dark brown to nearly black, crumbly, cool, and earthy-smelling, with the original ingredients unrecognizable (eggshells and the odd avocado pit get a pass — screen or toss them back). If it’s warm, smelly, or you can still identify last month’s salad, it needs more time; unfinished compost worked into beds can temporarily rob plants of nitrogen as it keeps breaking down.
Ways to spend it — there is no wrong one:
- Beds: spread one to two inches over vegetable and flower beds each year and let worms do the incorporation. The backbone of the fall routine in every vegetable garden.
- Planting: a generous handful in each transplant hole.
- Containers: blend up to a quarter compost into potting mix for hungry crops.
- Lawns: screen it fine and rake a thin layer over thin turf.
- Mulch: an inch around (not against) perennials, shrubs, and young trees.
A modest kitchen-plus-yard pile yields a few wheelbarrow loads a year — never quite enough, which is the universal compost experience and the reason three-bay systems exist.
Small-space composting, honestly
No yard doesn’t mean no composting:
- A tumbler on a balcony handles a household’s scraps (mind your browns supply — stockpile shredded cardboard).
- A worm bin indoors is quiet, odorless when balanced, and produces small amounts of exceptional fertilizer.
- Bokashi buckets ferment all food waste, meat included, in a sealed pail — the fermented product then finishes in soil, a friend’s pile, or a green bin.
- Community drop-off: many cities and community gardens accept food scraps; a freezer bag of scraps delivered weekly is composting too — you’re just outsourcing the microbes.
However it happens, the arithmetic stays wonderful: garbage in, gardens out. Start a pile this weekend — by the time your first raised bed needs topping up, you’ll have something homemade to fill it with.
Frequently asked questions
What should I never put in a home compost pile?
Meat, fish, dairy, oily foods, and pet waste from dogs or cats — they attract rodents and can carry pathogens a home pile doesn't get hot enough to reliably kill. Also skip diseased plant material, weeds that have gone to seed, and anything treated with persistent herbicides (some sprayed grass clippings). Everything else vegetal is fair game.
Why does my compost pile smell bad?
A healthy pile smells like forest floor; a stinky one is talking to you. Rotten-egg or sour smells mean too wet and airless — turn the pile and mix in dry browns like leaves or shredded cardboard. An ammonia smell means too many greens — again, add browns. Smell problems are almost always solved by the same prescription: more browns, more air.
How long does composting take?
A managed hot pile — built all at once, turned weekly, moisture maintained — can finish in one to three months. A casual add-as-you-go cold pile takes six months to a year. Both produce the same product; the difference is purely how much labor you invest versus how much time you allow.
Can I compost in winter?
Yes — decomposition slows or pauses in freezing weather but resumes in spring, and no harm comes to the pile. Keep adding kitchen scraps all winter (chop them smaller, and keep a bag of fall leaves next to the bin to cover each addition). An insulated or larger pile keeps working longer into the cold.
What's the difference between compost and fertilizer?
Fertilizer feeds the plant; compost feeds the soil. Compost's nutrient content is modest and slow-release, but its real work is structural: it improves drainage in clay, water retention in sand, and feeds the microbial life that makes nutrients available. Most gardens benefit from compost always and fertilizer only sometimes.
Do I need worms, starters, or activators?
No. The microbes that run a compost pile arrive free, on the materials themselves and in a shovelful of garden soil. Commercial 'compost starter' is harmless but unnecessary. (Worm composting — vermicomposting — is a different, deliberate indoor method, and the worms for it are a specific species you'd buy, not garden earthworms.)
Is composted material safe for vegetable gardens?
Finished compost — dark, crumbly, earthy-smelling, with the original materials unrecognizable — is not just safe but ideal for vegetable beds. Unfinished compost is the thing to avoid around plants: still-decomposing material can tie up nitrogen and harbor rot organisms. When in doubt, let the pile cure another month.